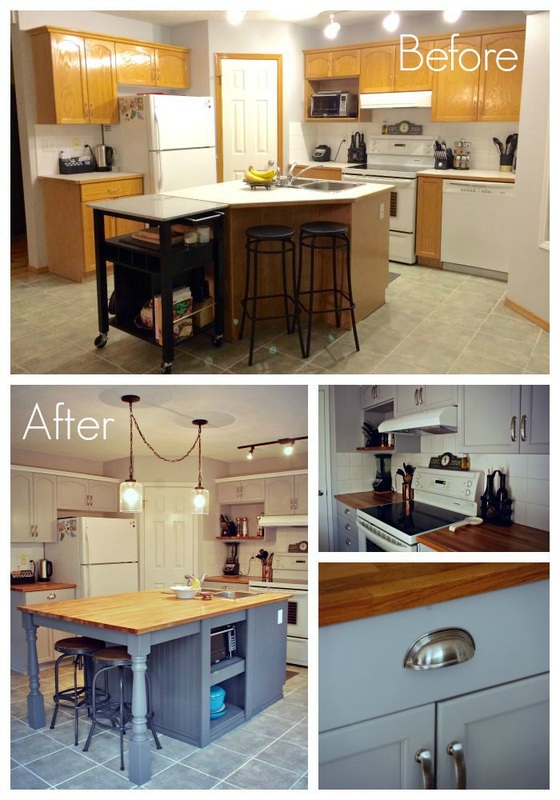
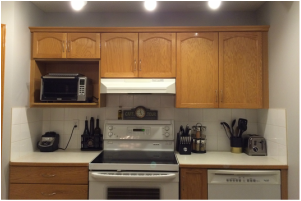
 Our house was built in the early 1990’s so while it has a great layout, it needs some updating. This is our first home and we have put a lot of love into it. We enjoy entertaining and the kitchen is always where people seem to gather. While it was functional, it was also bit of an eyesore. So we wanted to do a small (AKA cheap) reno to give it back some life. We did four main things:
I have detailed steps for 1, 2 and 3 in the guide. Skill Level: Beginner to intermediate  Made from some reused material and eco-friendly butcher block Cabinets and Trim We wanted to save some cash by reusing our existing “high gloss oak” cabinets. It was easy enough to do, but very time consuming. In the end, they turned out really well and was worth it! Materials
Tools
How to Guide Clean up and removal
Sands of time I am not for using paint stripper, as it is high in VOC, unless you absolutely have to. If your piece is just coated in a protective finish then I suggest only sanding, but sand thoroughly! You don’t need to get right down to the wood grain, but you want it to be a little rough so that the paint sticks. Be sure to get into all the nooks and crannies so that the details of your piece come through. This may take some time and patience, but it will be worth it in the end! When you are done sanding, wipe clean with a damp cloth so that the surface is smooth and dust free. New hardware If your new hardware is the same size, skip this step.
*Tip - if you are replacing your hardware with a different size, make sure that it is bigger so that it covers the holes of your old hardware. Paint, paint, paint
Painting back to front
*Tip – many thin coats are better than fewer thick coats. I did about 4 thin coats, with some light sanding between them for a smooth finish. Seal it!
Finishing touches
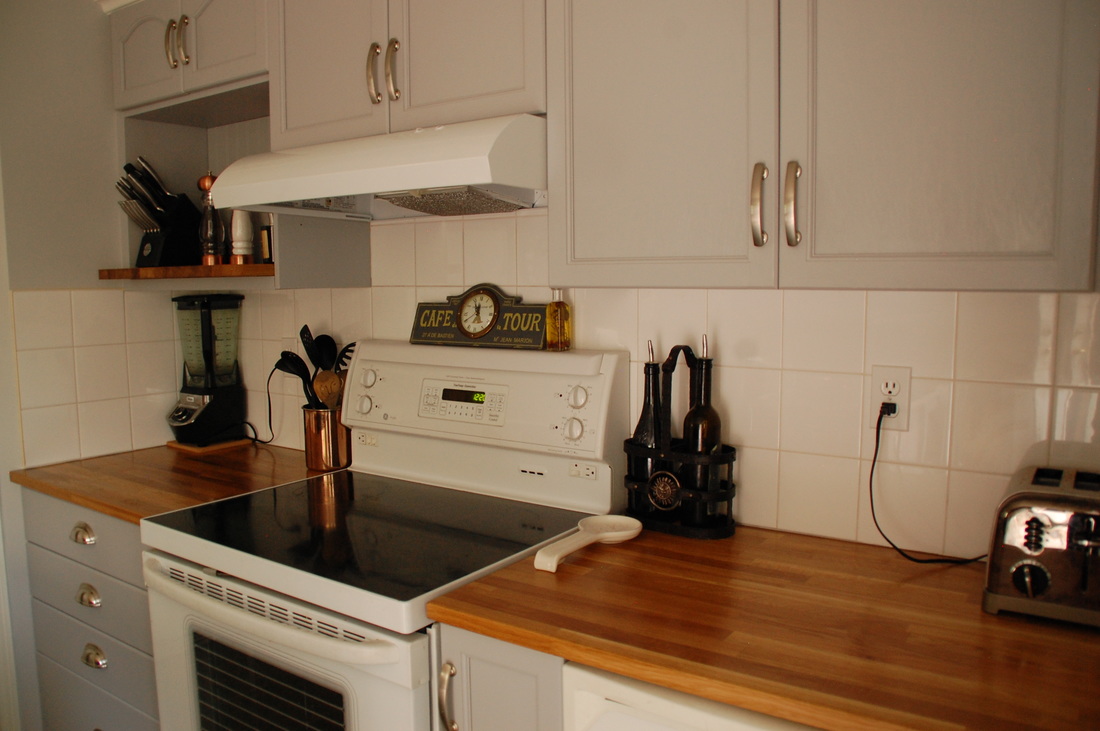
Cabinets and trim
*Optional – Add wainscoting and trim We used MDF paneled wainscoting and trim to give the cabinet bottoms a more finished look. Measure twice, cut once
Wipe and paint
Hang and bang
Reassemble
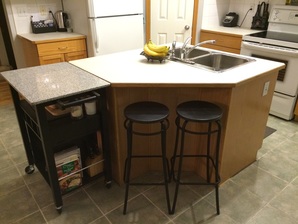
Extending the Island We wanted more counterpace (who doesn’t!) so we decided to extend our existing built in island. We also added some shelves based on the shape of our existing island because we had the space. Materials
Tools
How to Guide Measure twice, cut once
*Tip – I found that using making tape on the floor and then putting the pieces over top to get the correct measurement very helpful! 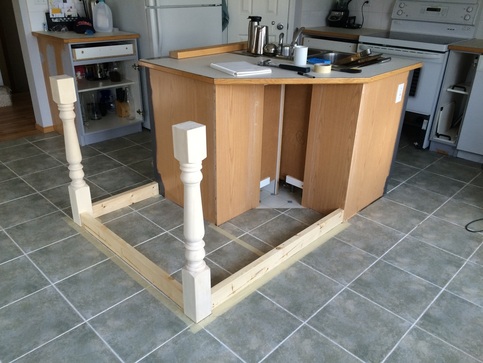 Paint, paint, paint
Painting back to front
Assemble!
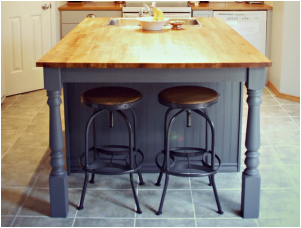
Now you just need to add the countertop!
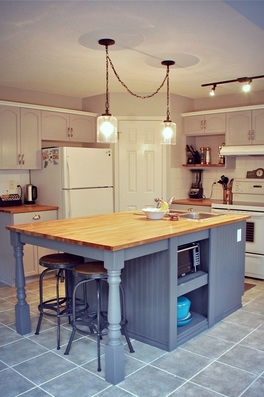
Butcher Block Countertops When we started this project we were just going to update the cabinets and lighting, but then I discovered Butcher Block. I love the warm look of the wood and it is super cost effective. So we ended up buying them from IKEA. Lucky for us our counter spaces are all rectangles and no angles, which makes cutting a little easier. Materials
Tools
How to Guide Measure twice, cut once
*Tip – Butch Block is somewhat malleable and tends to dry out a bit which can cause some misshape. Make sure that you keep it somewhere warm and laying flat (do not lean it up against a wall) until you are ready to use it. A small confession, we cheated. We had a professional cut and glue the Island counter top together for us. Since our island is much wider than the slabs available, we wanted to make sure that once the two pieces were glued together it was a level surface and held together. We didn’t have the tools, so we took it into Black Forest Wood Co. where the sliced, jigged and planed it for us, as well as cut the hole for our sink. It only cost about $200 and was well worth the small expense! Oiled up
*Tip – I did 2 coats on the front and back, but added a third coat to the area around the sink for added protection against water. Disassemble
Reassemble! Our Butcher Block came with brackets and screws that we used to assemble.
3 Comments
5/18/2016 03:41:57 am
I was very impressed by this post, this site has always been pleasant news Thank you very much for such an interesting post, and I meet them more often then I visited this site 11/18/2020 01:13:48 am
You completely match our expectation and the variety of our information. PLease go to site to Download Tik Tok video on mobile phone. Leave a Reply. |


Proudly powered by Weebly