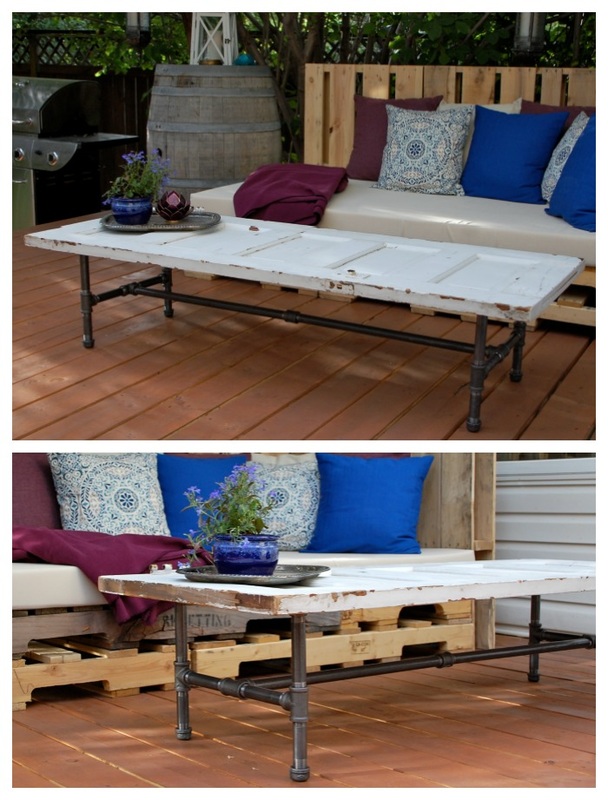
 After we built the Pallet Chaise Lounger, we realized we could use a table to go with it. I had a vintage door from our wedding décor that I wanted to incorporate, so all I needed was the base. The pipe worked out great; easy to put together, looks good, durable and weather friendly. Skill Level: Beginner  Made from some reused material Materials I used ¾ inch pipe, you can go bigger or smaller, just make sure all is the same.
Pipe and pipe fittings required shown below: 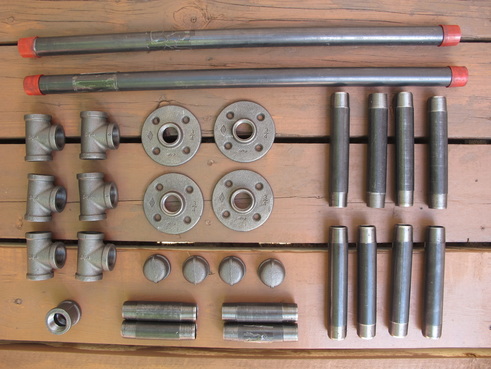 Tools
How to Guide Vintage Door Table Top Cut it out
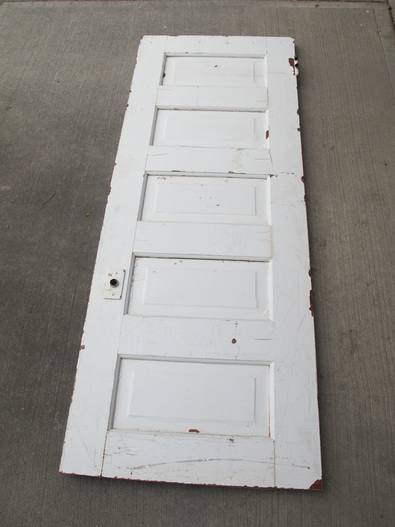 Sand it
Paint
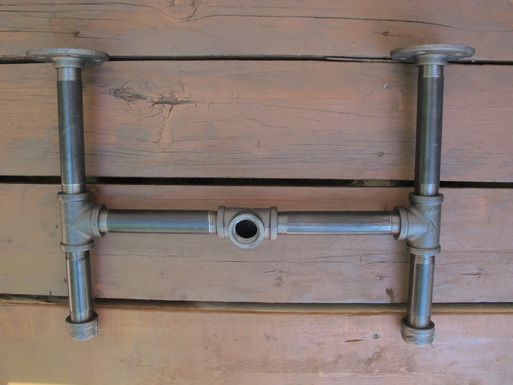
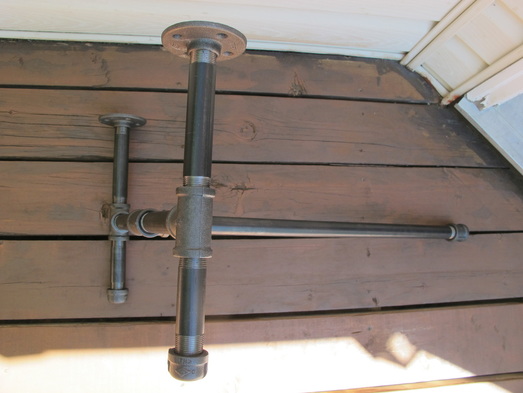
Pipe Base I suggest wearing rubber gloves when you are handling the pipe as it generally comes a little greasy, especially black pipe. Wipe it down with a rag and kitchen cleaner (like Fantastik) so it doesn't rub off everywhere. Connect Four
 Connect more
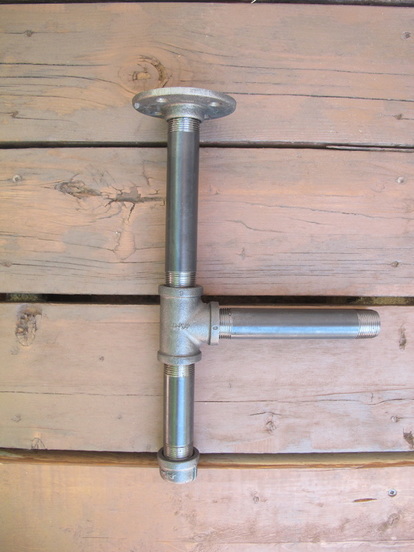 Connect tees
Connect legs
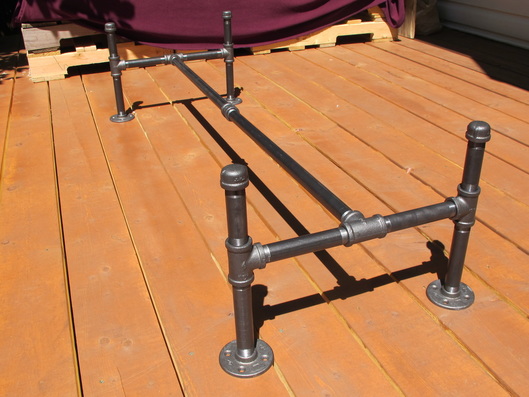
 Connect base pipe
 Connect all
 Screw it
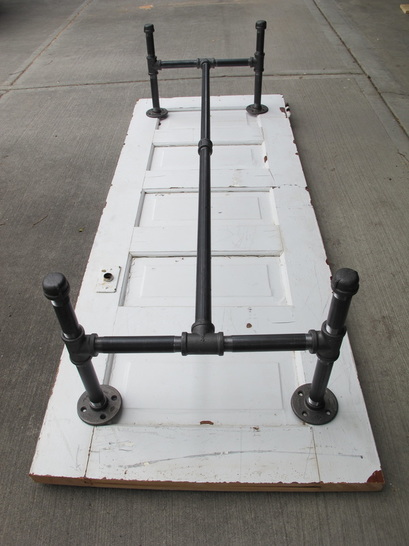 Place the table, grab a drink and kick your feet up!
0 Comments
Leave a Reply. |

Proudly powered by Weebly